How To Take a Proper Segment Height

As part of our new dispenser series of blogs this week, we're going to dive into some simple tips for taking seg height measurements. Following these tips will not only ensure proper fit but also lead to more comfortable adaptation and overall lens performance.
Thankfully, modern progressives are much more forgiving than their predecessors. This has allowed for some success in online retail, where patients often rely on guesstimates or cell phone apps to determine a "proper" fit. While these methods may work to some extent, I'm not convinced that online patients are getting the best possible experience with their lenses due to improper fit.
And that's where you, the Eyecare Professional, come in. You can offer what online retailers simply can't: a proper pair of glasses that fit perfectly, with lenses positioned in the optimal spot customized to each patient's unique needs. No two patients are the same, and their individual needs, habits, and tendencies are often overlooked by big-box optical and online retailers.
This level of personalized service is what sets you apart from the competition and adds value to the sale.
Now, let's start with the basics. Each segment has its own specific fitting height, but remember, these are just starting points. We'll explore customizing these heights based on the patient's needs later in this blog.
Specific Fitting Heights - Where to mark the demo lens:
- Progressive lenses: On the pupil
- Bifocal lenses: At the top of the lower eyelid
- Trifocal lenses: At the lower edge of the pupil
Steps needed for properly marking the lenses or dotting the pupils:
- Adjust the frame to the patient, adding some face form and pantoscopic tilt for that perfect fit.
- Get on eye level with the patient to ensure the most accurate mark possible.
- For progressive lenses, dot the center of the pupil. For bifocal lenses, mark at the top of the lower eyelid. For trifocal lenses, mark at the lower edge of the pupil.
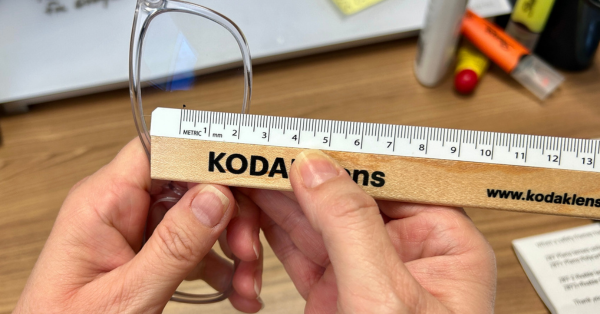
Once you've marked the demo lenses, it's time to measure the segment height with your PD stick. Measure from the mark to the bottom edge of the lens, not the frame itself. In most cases, the lens will be about 1/2mm into the eye wire of a metal or zyl frame.
Keys to success:
Pay attention to your patient's posture. If they sit hunched over, you might want to raise the seg height by 1-2mm. If they're very tall and hold their head back, consider lowering the seg height by 1-2mm.
Consider their specific needs. If they read a lot and spend very little time on a computer, a short corridor progressive lens may be the best choice to allow them to get into their reading area sooner.
 Also, make sure there is at least 10mm of distance vision above the fitting cross in a progressive lens. Less than 10mm may not provide enough distance vision and could lead to non-adaptation. If the frame cannot be adjusted down, you may need to restyle at this point.
For bifocals and trifocals, adjust the fitting height to best suit your patient's needs.
Before dispensing the new lenses, always double-check that the lab has positioned them as ordered. While labs do their own checks, it's important for you to double-check for several reasons. Additionally, it can save your patient from picking up a pair of glasses that are incorrect.
Most importantly, knowing that the fit is proper will boost your confidence during the dispensing process. This confidence often makes all the difference in whether a patient adapts successfully to a new lens or prescription.

